Get your rental business website set up for free
Reach out to us by sending a message, and we'll be happy to address any questions you may have about building your rental website.
Free setup assistance • No technical knowledge required • Get online in 24 hours
Tell us about your business
Quick Start Guide: Build Your Rental Website in 6 Easy Steps
Watch Our Quick Setup Video Guide
Want to get your rental website up and running in minutes? Watch our comprehensive video guide below that walks you through the entire setup process step-by-step. You'll learn how to:
- Set up your business profile quickly
- Add your first rental products
- Customize your website's look and feel
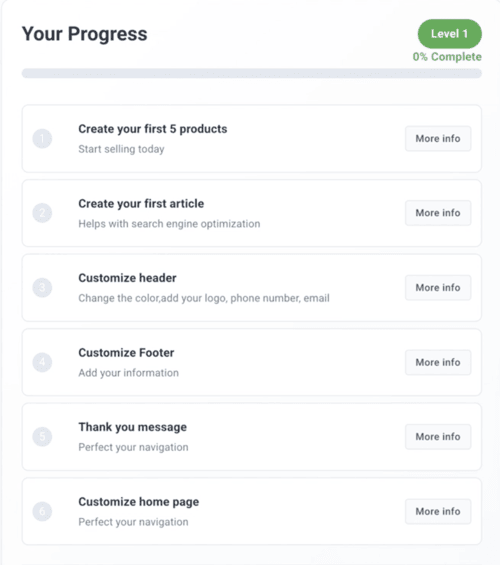
Track Your Progress
After logging in, you'll see the dashboard which displays important tasks to complete for your rental website setup. In the dashboard, there's a progress bar with a list of tasks underneath it. The progress bar shows the percentage of completed tasks. As you complete each task, return to the dashboard to track your progress - the bar will automatically update to reflect your completed items and the task will be marked as completed.
The dashboard will show you a progress bar that will be 100% completed when 6 tasks are done.
The 6 Tasks to Complete Your Website Setup:
Here's more details on each of the tasks. We include some images.
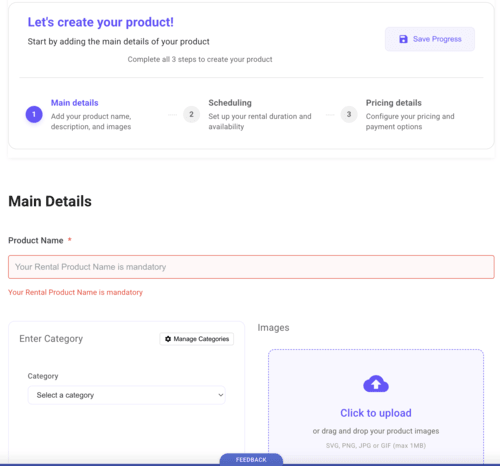
1. Create Your First 5 Products
Start by adding your rental inventory. Each product should include:
- Main details like name, description, and images
- Selecting the scheduling form to show
- add add the pricing information
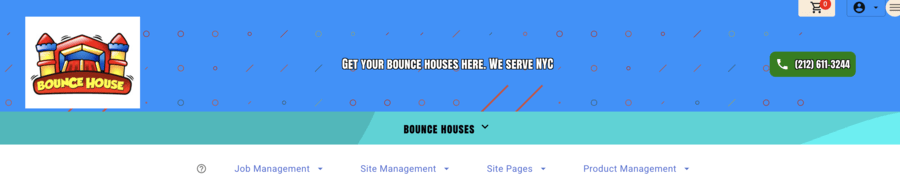
You can access the create product page by clicking on the product management button in the admin navbar.
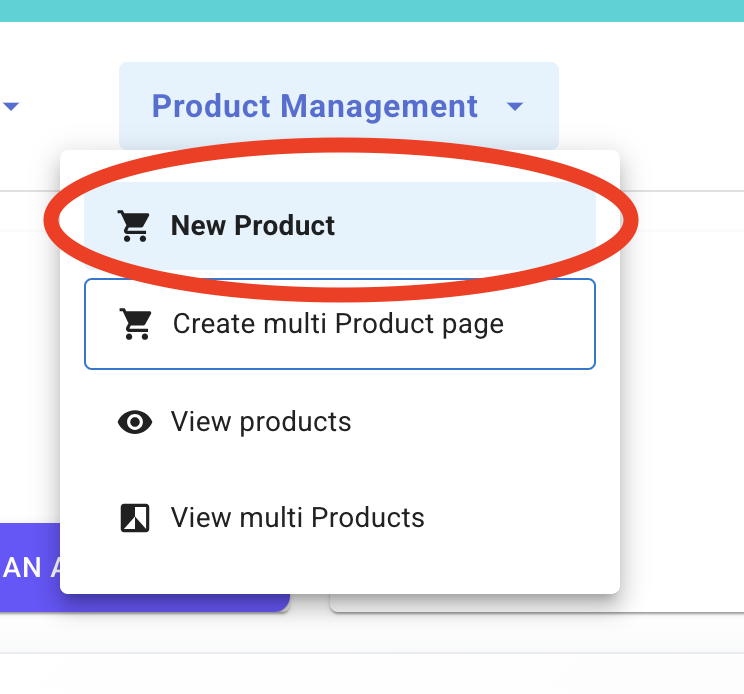
You must add at least 5 products to complete the first task. You can do the task in any order you would like.
All you have to do to create a product is follow the 3 steps inside the app. The 3 steps are adding the 1) main details (name, description, images), 2) selecting the scheduling form to show, and 3) adding the pricing information.
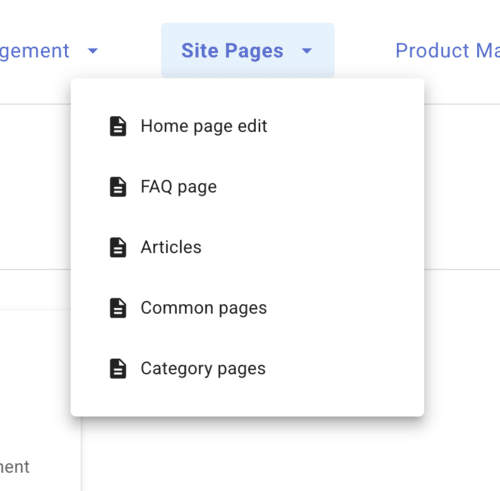
2. Create Your First Article
Content marketing helps drive traffic to your site.
Some ideas of articles can be a type of party that will use your equipment, or a guide on how to use your equipment.
You can access the create article page by clicking on the article management button in the admin navbar.
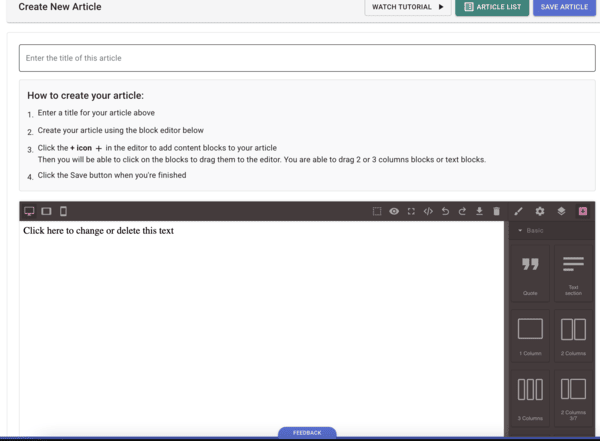
You can drag block elements from the right sidebar to the main content area in the block editor that is used to create the article.
Some example of block elements are text, images, and videos.
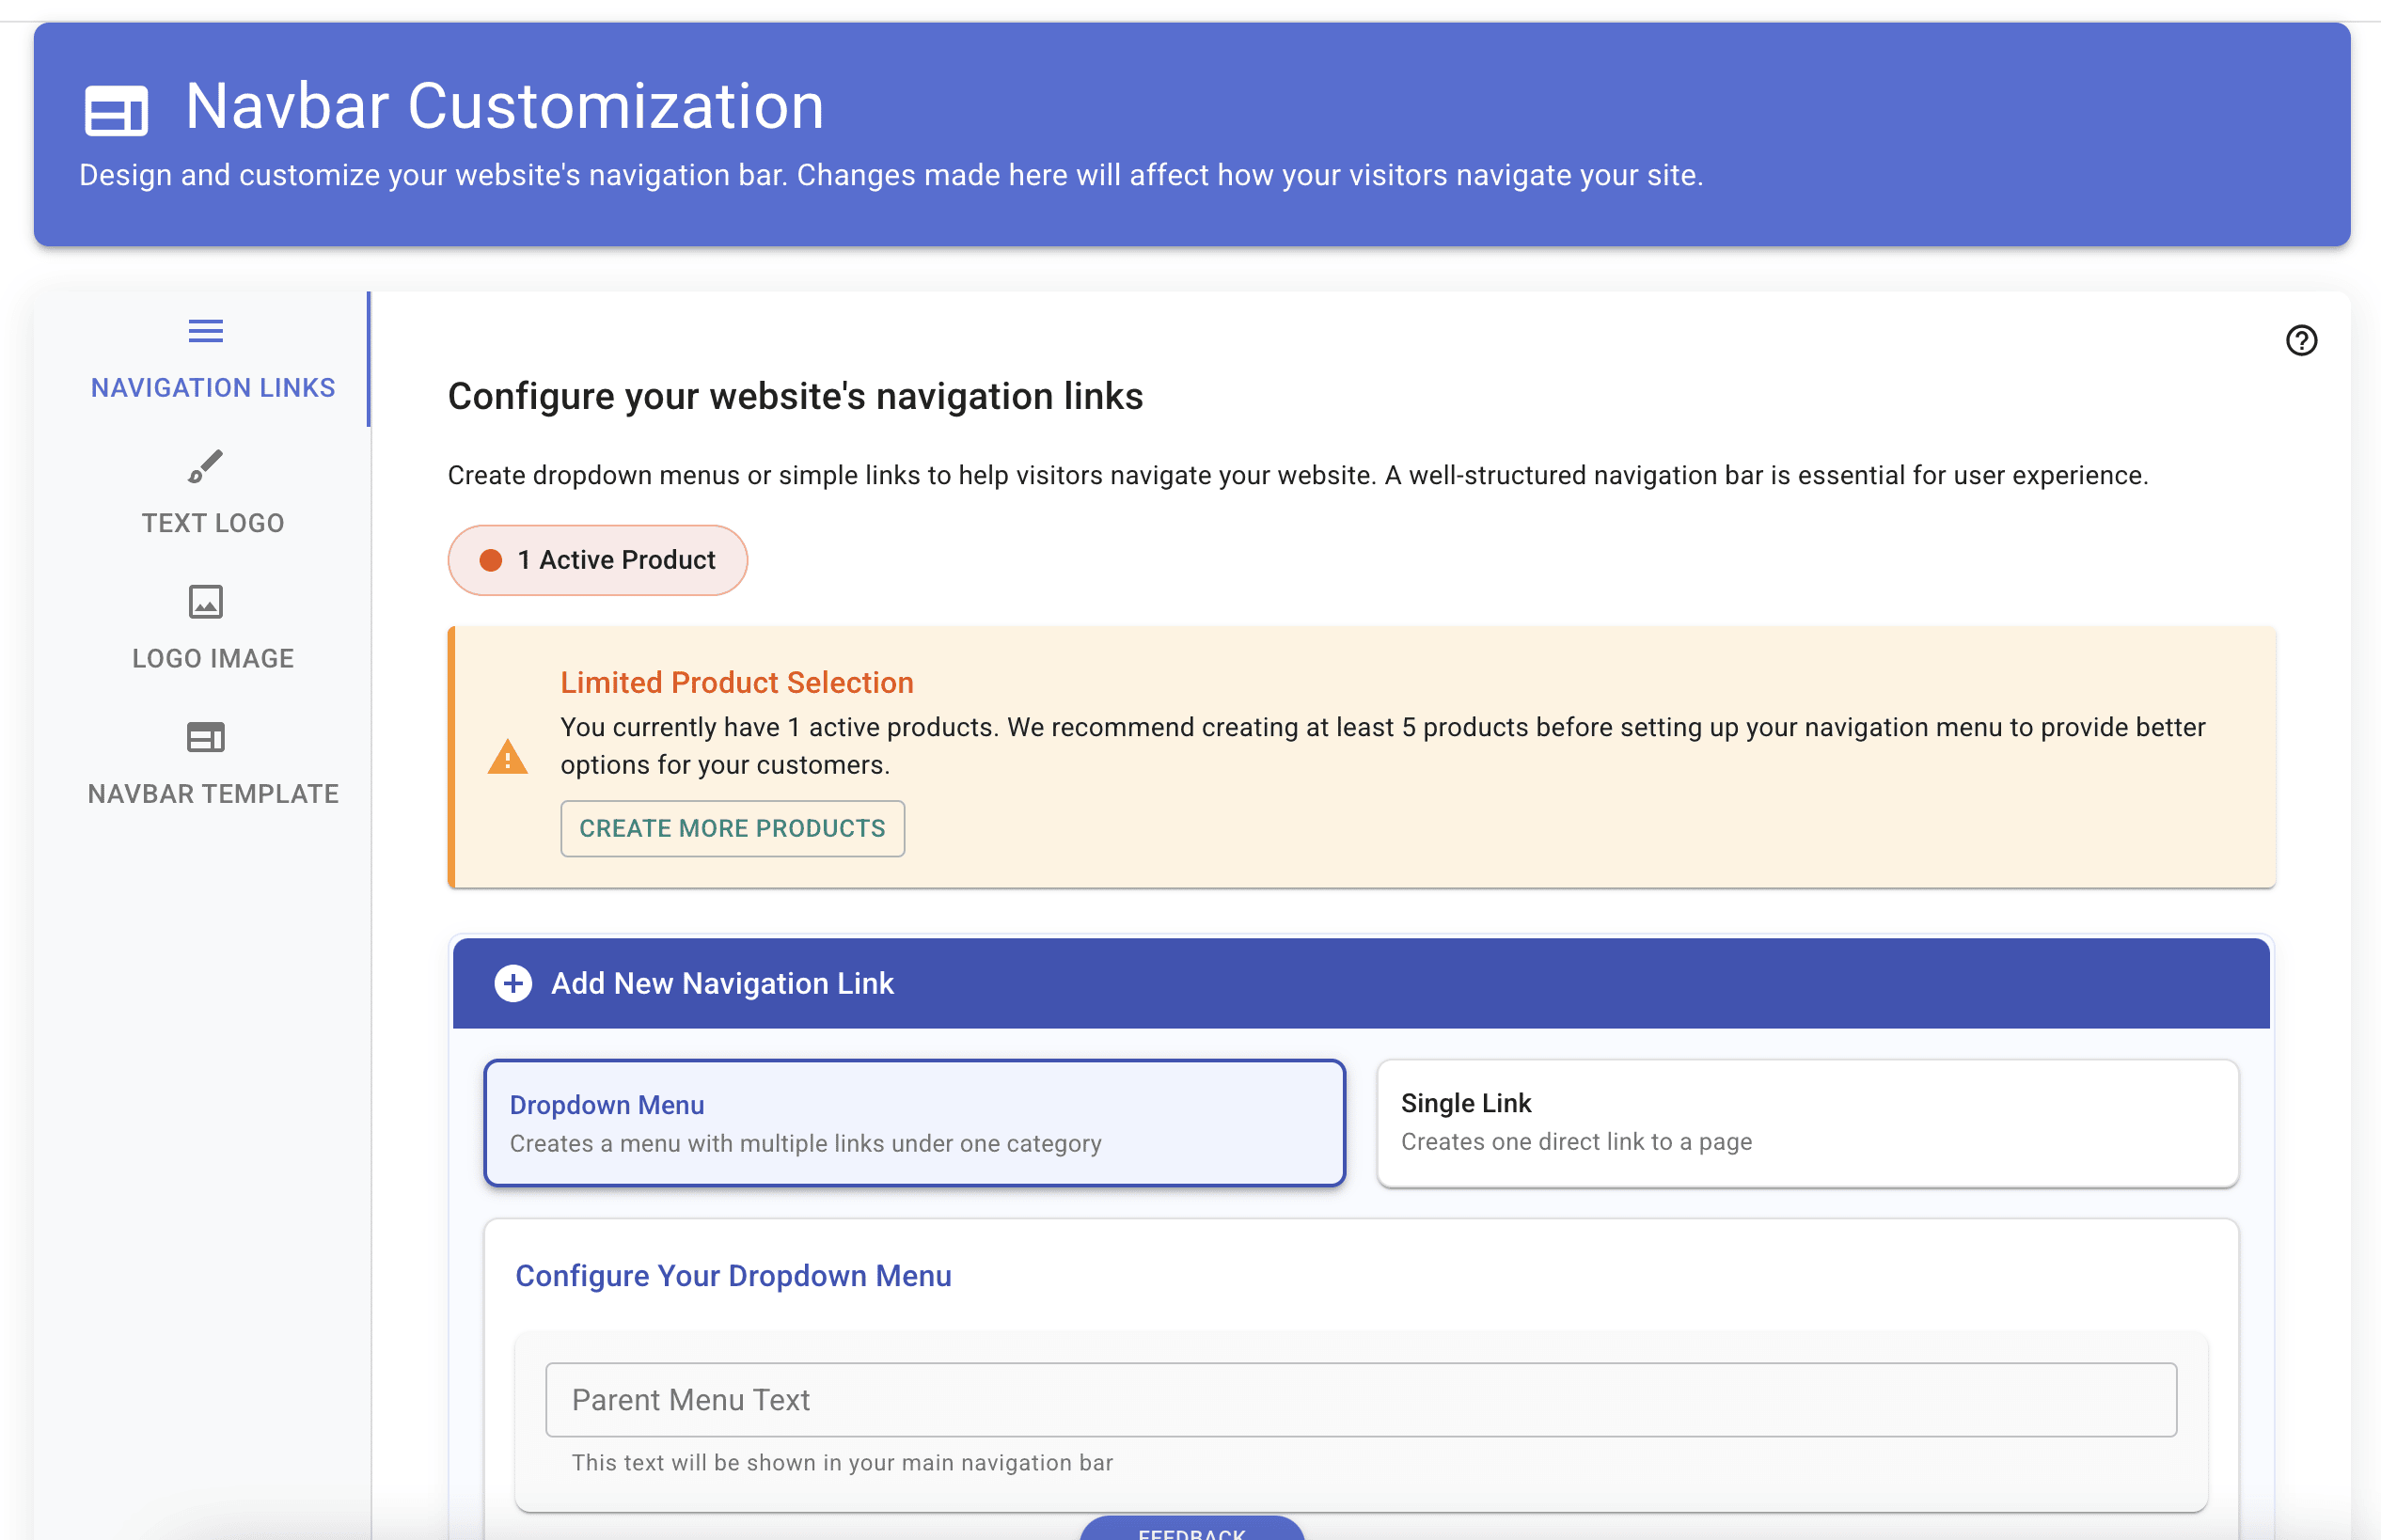
3. Customize Header
Your header creates the first impression for your rental website.
You can customize the header by adding a logo, phone number,and text. You can also add dropdown links to give customers easy access to your rental products.
In the header settings page you will see tabs on the left that will give you access to the different settings. For example, click on the Navigation links tab to add a dropdown link to your header.
You are able to change the logo text or add a logo image.
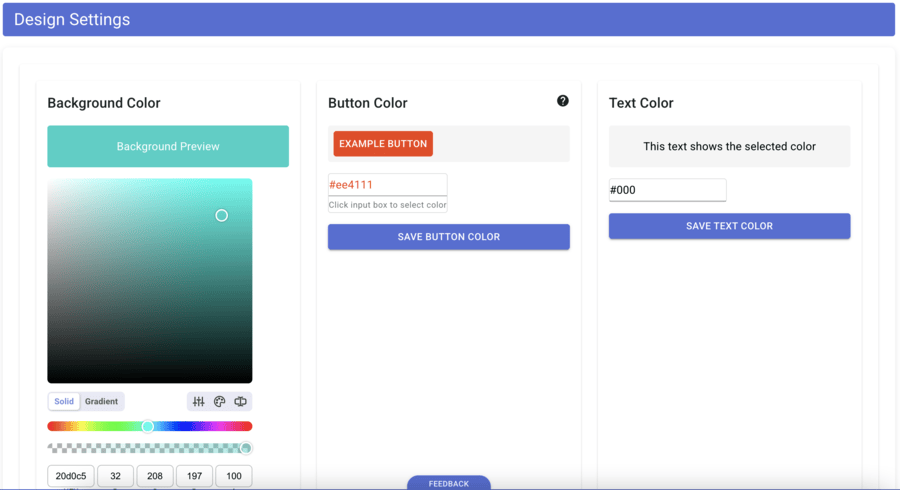
You can also add a phone number to the header and change the color of the header.
4. Customize Footer
An effective footer improves navigation and builds trust:
- Add social media links
- Include contact details
- Feature legal information
- Add navigation links
5. Customize the Thank You Message
Enhance customer experience after bookings with a personalized thank you message:
- Confirm booking details
- Provide next steps
- Add contact information
- Consider special offers for repeat bookings
You can access the settings page by clicking the Site settings page in the admin navbar.

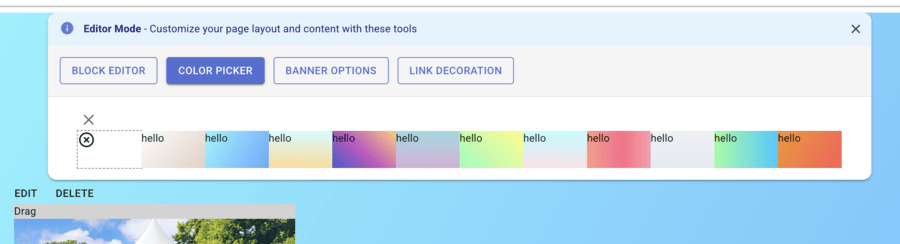
6. Customize the Homepage
Create an engaging homepage that showcases your unique rental business:
- change the background color
- drag and drop your products to the homepage
- add a youtube video.
- add custom text to the homepage
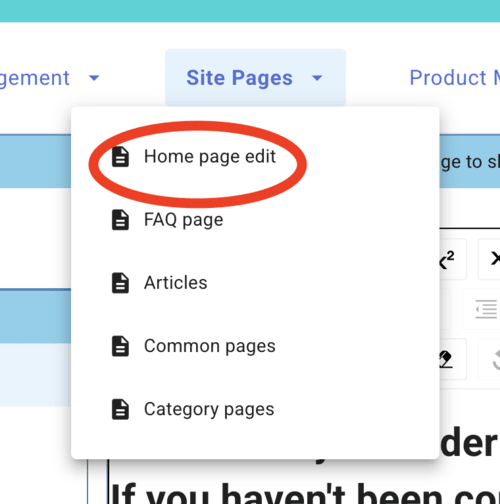
On the homepage edit page you will see a an edit bar with a list of elements to add to the homepage. One element is adding a link on the homage so users can have an easier access to the page you would like. It can add a custom image to the link.
Related Readings
RentalSetup
The easiest way to build your rental business website. Get started for free.
Legal
Privacy Policy© 2026 RentalSetup. All rights reserved.