✏️ Build Professional Party Rental Product Pages — No Coding Required
Go beyond plain text. Add hero banners, videos, two-column layouts, category sections, and more to your product pages and homepage with the RentalSetup block editor.
Updated:
Table of Contents
Why Your Party Rental Product Pages Need More Than Text
Most party rental websites list products with a short paragraph and a price. That's it. Customers have to squint at a thumbnail and guess whether a 15-foot bounce house will fit in their backyard. You're leaving conversions on the table.
The RentalSetup block editor changes that. You can now build product pages and homepage sections that look like real marketing pages — with full-width hero images, embedded videos, organized data tables, side-by-side image and text columns, and clickable category grids. No developers, no plugins, no extra cost.
Visual Hero Banners
Full-width background images with overlay text and an icon trust bar underneath.
Two-Column Layouts
Put a photo next to a bullet list. Choose even, left-wider, or right-wider columns.
Embedded Videos
YouTube, hosted MP4 links, or direct video uploads — three ways to show your rentals in action.
Category Section
Clickable cards organized by event type — perfect for homepage navigation.
Data Tables
Pricing tiers, sizing charts, and what's-included lists that customers can scan at a glance.
Phone Call Button
A tap-to-call button that opens the dialer on mobile — ideal for on-the-spot inquiries.
Ready to build a product page that actually converts?
Start Free with RentalSetupOverview of the Block Editor
There are two main ways to access the block editor:
1. The Block Editor button
On the edit homepage, product page, and multi-product page you'll find a Block Editor button. Clicking it opens a dialog where you can build and insert blocks directly onto that page. This is the main way to add rich content to your homepage and product listings.
2. The description editor on product pages
When you're on the interactive product page and click the Edit Description button, the block editor opens inline — right where the description lives on the page. You edit in place without a separate dialog. This option is only available on individual product pages, not on the multi-product page.
Both access points use the same editor and the same blocks. The toolbar is organized into groups: text formatting on the left (headings, bold, italic, font size, text color), then block insertions moving right — images, videos, column layouts, tables, and the two hero section types. Everything is point and click.
💡 The same blocks work everywhere — homepage and product pages. For the multi-product page, use the Block Editor button to add content.
Two-Column Layouts: Make Your Pages Less Boring
A wall of text is the fastest way to lose a customer. Two-column layouts break things up visually and let you place a photo right next to the content it supports — like an image of a bounce house next to a bullet list of what's included in the rental.
Click the ⬛⬛ 2 Cols button in the toolbar to insert a two-column block. Use the dropdown arrow next to it to choose from three layout options:
- Even columns — both sides equal width, great for two images side by side
- Left wider — a longer column on the left, shorter on the right; use for main content + a sidebar image
- Right wider — longer on the right; useful when the image should be the focal point
Inside each column you can type, add images, embed videos, or insert almost any other block. The columns stack automatically on mobile so nothing breaks on smaller screens.
⌨️ If your cursor gets stuck inside a column and you can't get out, click inside the column and then use the red ✕ button that appears in the toolbar to delete the block — or press Enter at the end of the last line to continue below it.
Common two-column ideas:
- Photo of rental + what's included list
- Setup dimensions image + booking instructions
- Customer testimonial + your contact info
- Before/after event photos side by side
- Pricing table + CTA button column
Adding Videos to Your Rental Pages — 3 Ways
Video is one of the highest-converting types of content for party rental businesses. A short clip of a bounce castle inflating or kids jumping inside it tells customers more in 10 seconds than a paragraph ever could. RentalSetup gives you three ways to embed video directly into any product page or homepage block.
See the block editor in action — adding hero sections, columns, and media to a party rental product page.
▶️ Method 1 — YouTube Link
Paste any YouTube URL into the editor and it auto-embeds a responsive player. Best for long-form setup videos, customer testimonial clips, or anything you've already posted on YouTube.
🔗 Method 2 — MP4 URL
Paste a direct link to any hosted video file (like a Cloudinary or CDN URL ending in .mp4). The editor inserts a native video player. Works great when you want autoplay or a looping clip without YouTube branding.
⬆️ Method 3 — Direct Upload
Upload a short video clip directly from your computer. Ideal for a 5–10 second preview loop — a quick pan of the inflatable, the setup crew, or the rental in action at an event. Stored automatically on your account.
🎥 Short videos (under 30 seconds) showing the rental in use at an actual event perform best. Film with your phone in horizontal mode for the cleanest result on desktop and mobile.
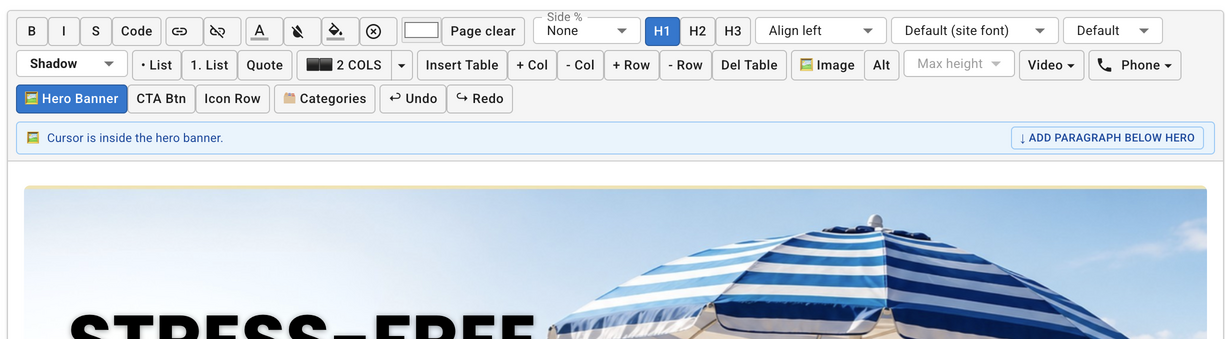
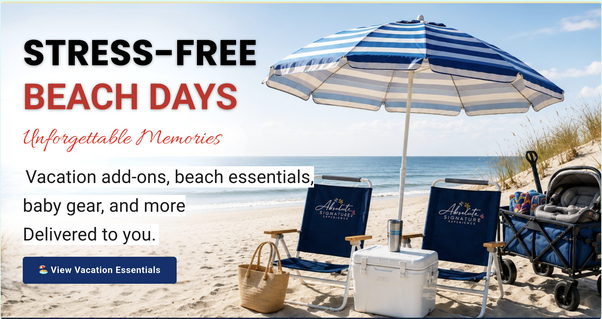
Hero Banner — Full-Width Background Image with Text
The Hero Banner is the most visually impactful block in the editor. It fills the full width of the page with a background photo — a party setup, a backyard event, happy kids around an inflatable — and overlays your headline and subheading text on top with a dark translucent overlay so the words are always readable.
To insert a hero banner:
- Click the 🖼 Hero Banner button in the toolbar
- A dialog opens where you can upload your background image
- Adjust the overlay darkness so your text stands out
- Type your headline and subheading directly on the banner
- Click Update to save the changes
🏆 The hero banner works especially well at the top of your homepage. Pair it with the Icon Row below it to show trust signals like "Insured", "Free Delivery", and "5-Star Reviews" right after customers see your hero image.
Category Section — Let Customers Browse by Rental Type
If you rent out multiple types of equipment, the category section is one of the most useful blocks you can add to your homepage. Instead of sending every visitor to a long product list, you give them clickable cards — one for Waterslides, one for Tents, one for Chairs & Tables, one for Inflatable Games, and so on. Each card links directly to that category page.
Each category card has its own background image, color, title, and link. When a customer clicks a card they land on the category page for that rental type — which you can also add custom text and description to.
📂 To set up category pages — including how to attach a category to a product and how to add text to a category page — see the Product Categories Page guide.
✏️ Important: How to Edit the Category Section
Unlike regular text blocks you cannot click directly inside the category section to edit it. Instead, click anywhere on the category section to select it, then click the 🗂 Categories button in the toolbar. A full dialog opens with all the fields — headline text, colors, category cards, images, and links.
What you can customize per card:
- Card title (e.g. "Waterslides")
- Background image
- Card color / overlay
- Link to the category page
- Section headline and accent phrase
- Subheading text
- Section background color
- Up to 5 cards
Common category card examples:
- 💦 Waterslides
- ⛺ Tents
- 🪑 Chairs & Tables
- 🎮 Inflatable Games
- 🏰 Bounce Houses
Icon Row — Build Trust in One Glance
The Icon Row (also called a trust bar) is a horizontal strip of icon-label pairs that sits below your hero banner or anywhere on the page. It's one of the highest-ROI things you can add to a rental website because it answers the three questions every new customer silently asks: Are you insured? Do you deliver? Are other people happy with you?
Click the Icon Row button in the toolbar to insert or edit the trust bar. A dialog lets you set the background color, text color, and as many icon-label pairs as you want. Each item has:
- An emoji icon (or any Unicode symbol)
- A bold title line (e.g., "Fully Insured")
- A smaller subtitle line (e.g., "Licensed & bonded in all counties")
📌 If you click Icon Row while your cursor is inside a hero banner, it automatically inserts below the hero — not inside it. No need to click outside first.
Example icon row preview
Data Tables — Show Product Specs at a Glance
The table block is ideal for displaying product information — things like how many kids fit in an inflatable, what size setup area is required, weight limits, or what's included with each rental. Customers can scan a table in seconds instead of hunting through paragraphs.
Note: the table block is not meant for pricing. Your rental pricing and packages are managed separately from the product settings. Use tables for specs and details that help customers understand the product itself.
Good uses for tables on rental product pages:
- How many kids can fit (by age group or size)
- Inflatable dimensions and setup area required
- Weight or height limits
- What's included with the rental
- Setup time and breakdown time
| Size | Kids (ages 5–10) | Setup Area |
|---|---|---|
| 13 x 13 | Up to 6 kids | 18 x 18 ft |
| 15 x 15 | Up to 8 kids | 20 x 20 ft |
| 18 x 18 | Up to 12 kids | 23 x 23 ft |
Example: bounce house capacity and setup area table
Click Insert Table in the toolbar to add a table at the cursor position. Use the + Col, + Row, - Col, and - Row buttons to resize it. You can type directly in any cell and style the text with the same formatting tools as the rest of the editor.
Where Does the Editor Output Go?
Everything you build in the block editor is saved as structured content that gets rendered wherever you place it. There are three places you can use it:
📦 Product Page Descriptions
Open any product in the admin and find the Block Editor button near the description field. Everything you add here appears on that product's public listing page — below the booking form, visible to every customer who lands on that product.
🗂 Multi-Product Page
The multi-product page lets you group several rentals on one page — great for showing all your bounce houses or all your tent options together. The block editor works here the same way as on individual product pages.
Learn about the multi-product page →🏠 Your Homepage
On the homepage editor, look for the Block Editor drag block. Add it to your homepage layout and open it to insert hero sections, category sections, icon rows, or any other content — the same editor, the same blocks, displayed right on your main landing page.
🏠 The hero banner and category section are especially powerful on the homepage where first impressions matter most. Product page descriptions benefit more from videos, tables, two-column layouts, and the phone button.
Get Started — Build a Better Product Page Today
You don't need to rebuild your entire site at once. Pick one product — your most popular rental — and open its block editor. Add one thing: a two-column layout with a photo on the left and a what's-included list on the right. Save it. See how it looks on the live page.
Once you're comfortable, work your way up to a hero banner, an embedded video, and a specs table. Your product pages will start standing out from every other plain-text rental listing in your market.
RentalSetup
The easiest way to build your rental business website. Get started for free.
Legal
Privacy Policy© 2026 RentalSetup. All rights reserved.