Walk-through of building your rental website with RentalSetup:
First few things you should do after you sign up.
Want to start building your rental business website fast? This guide will show how easy it is to customize your site with the rental website builder, RentalSetup. We'll go over some actions you can do right after you signup so you can start customizing your website immediately. You will learn how you can add content and style to your website.
Some of the things we will discuss are:
Change the default logo which is the subdomain you entered.
By default the logo that appears at the top left corner of the website will be the subdomain you had chosen for your site when you first signed up with RentalSetup. You are able to change that text logo by following the instructions below.
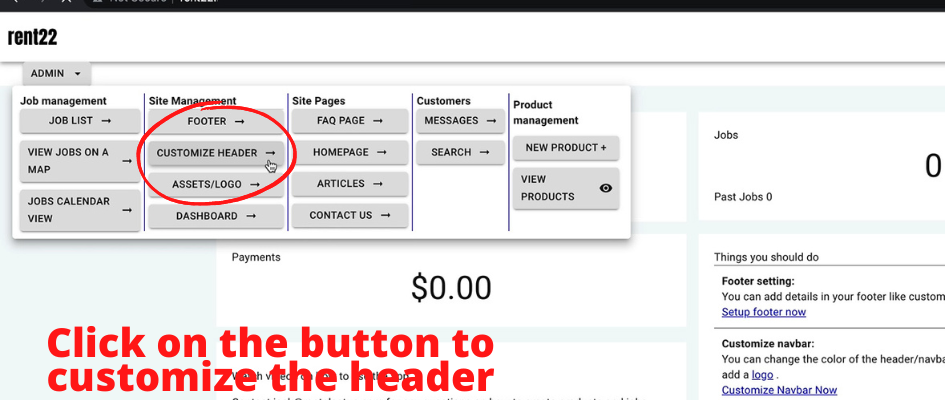
After you log in to the backend of your website, you can click on the admin button at the top. Then in the dropdown, click on the "customize header" button. The navbar/header page opens up. Then you can click on the tab button on the left that says "Text Logo". Now you are able to change the text logo.
Refresh the page to see the new text logo in action. You may want to change the text logo from the subdomain to add spaces in your text because when you created the subdomain you were not allowed to use spaces.
Below shows the area to enter in your new text logo.
Add an image logo to your rental equipment website.
To add an image as a logo, you click on the asset/logo button in the dropdown after you click the admin button. The asset page shows up and you are able to upload a logo.
When you refresh the page you will see the logo at the top right corner.
Add A favicon to your website
You can go to the "asset page" again and upload your favicon. The Favicon is a small logo that is inside the browser tab.
Change the color of your site's header.
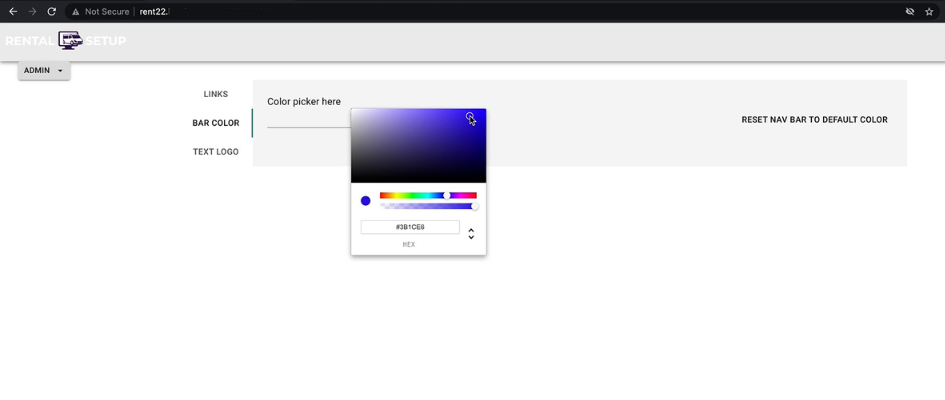
To change the color of the header you can go back to the navbar settings page and this time click on the "bar color" tab button on the left side. Now you will be able to select a color for the header.
So far you have seen 4 ways to customize your rental website built on the RentalSetup platform. There are more ways to customize your header, like adding links and custom text. But that is all we will do for the header at this time. Now I would like to make changes to the footer.
Start building your party rental website today.
Start nowCustomize your rental website's footer.
The footer is great because it customizes your website and it provides information about your business on all your web pages.
You can include in the footer:
- your rental business contact information (ex: phone number).
- some text you want your customers to read.
- delivery zip code areas.
- Links to your products.
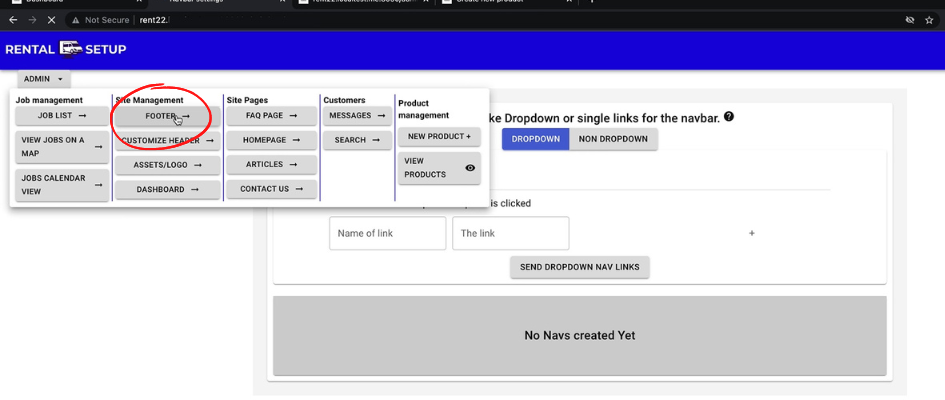
You can customize your footer by going to the admin button and then clicking on the "footer" button in the dropdown
Here is what the footer settings page looks like.
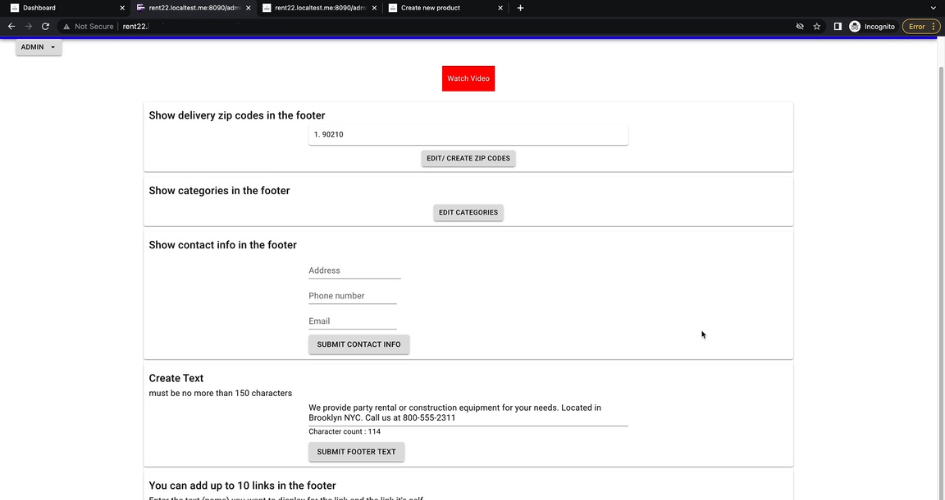
Once you submit your changes for a specific footer content by clicking the button next to it, you can reload the footer settings page and you will see your updated footer.
Create your first product
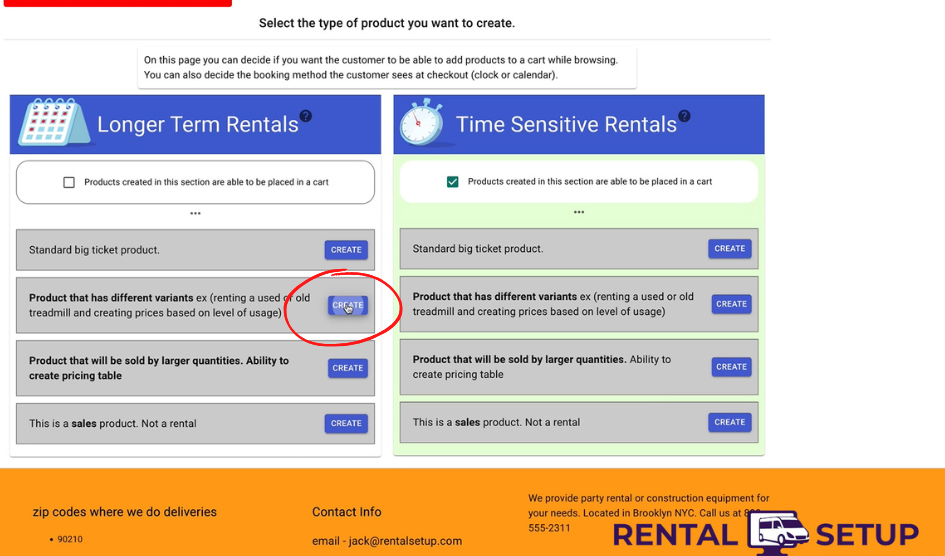
To create your first product you again click on the admin button, but in the dropdown, you should click "New Product". Once that's done, the "product create page" opens up.

The create page looks like this
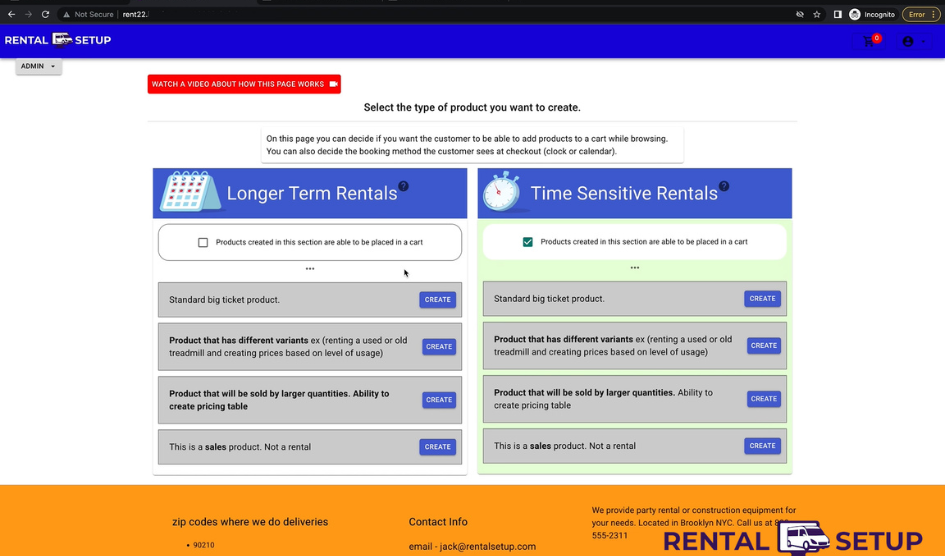
Learn more about how the "product create page" works to create your rental products.
You can show 2 types of scheduling booking input areas to your customer based on which column you created the products. You can see above that there are 2 columns that represent scheduling options. One is long-term rentals the other is Time sensitive rentals.
For now, I'm going to click on the first product style which is a "big-ticket" product.
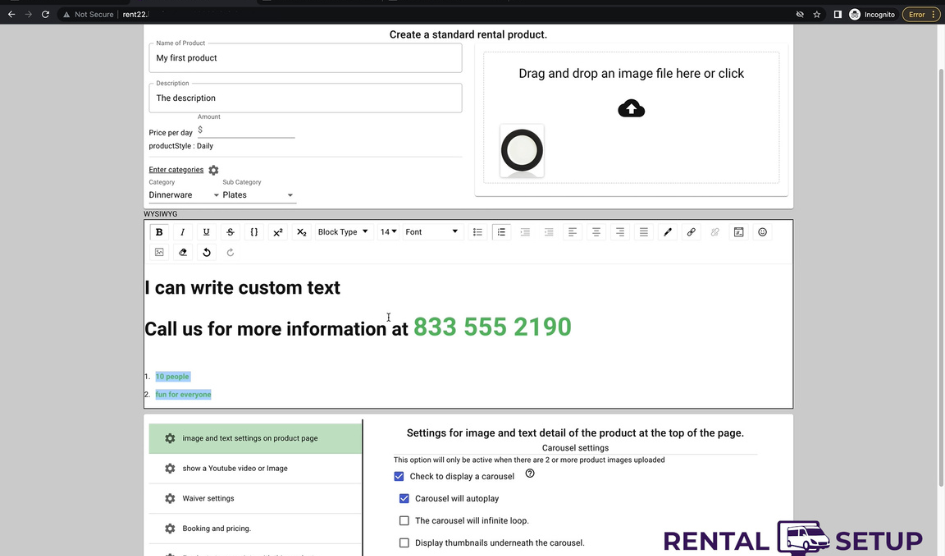
The information I enter for the product
- Name of the rental product.
- Description for the product
- Image
- Links to your product
- Price of the rental item
- Rich-text format (allows me to customize the text. Ex: color and size of text)
- Category of the product.
This is what the product page looks like by default.
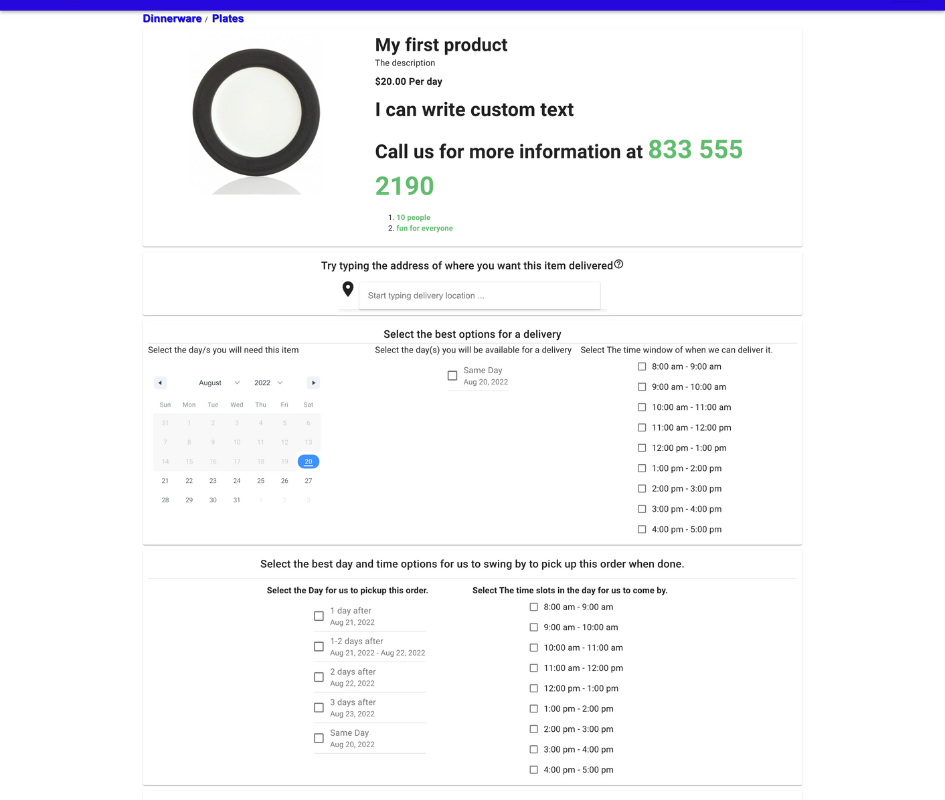
You should know that you are able to add banner images, Youtube videos, PDF waiver that needs to be signed, and similar products.
We also have the option for you to prevent overbooking by not accepting jobs if the inventory is not available.
You can assign categories for your products.
When a user clicks the category at the top of the product page, in the image above the category is "Dinnerware", the customer will be brought to the category page where they can see all the other products in the category.
Make sure you read up on how to create and updated categories for your products.
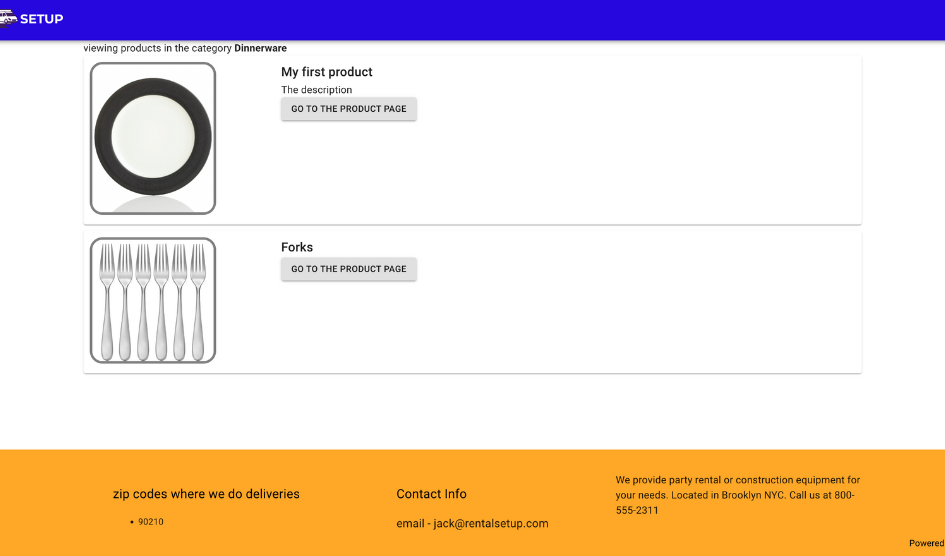
In the image below you can see a category page with only 2 products. I'm showing you an example of a category page.
Create a product for large Quantities
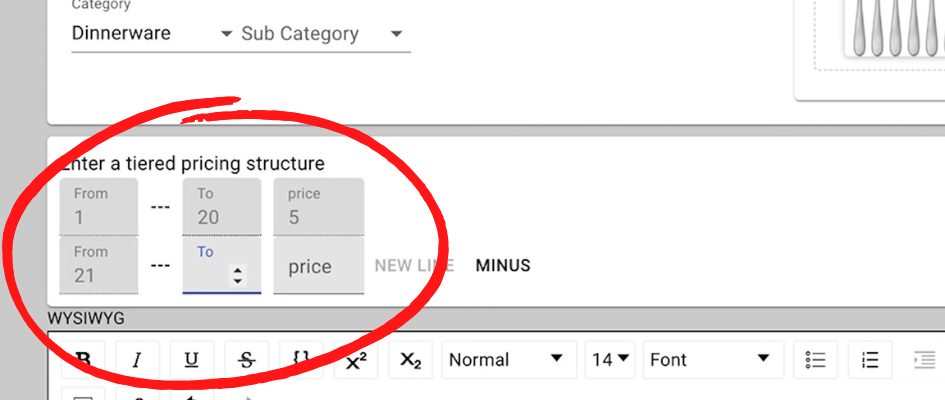
Products made with the Large Quantity style will show a price discount table on the product page.
The customer can click on the number of items they want to rent and see how much it will cost them. You will be able to offer quantity discounts for certain price tiers.
Now I will show you how to create a second product. This product will be made in the product style of "Larger quantity". So I will click on the "create button" in the "Large Quantity" section on the "Create Product Page"
After you click the "create button", the product information input dialog box shows up and since you clicked the "Large Quantity" style product, a price discount input area is available.
Conclusion
After you follow the steps in this article, you will have a fully functioning rental website that you can use to rent out items to your customers. You will be able to customize your header and footer, create products, and manage your inventory all from within the RentalSetup platform. With our easy-to-use interface, you'll be up and running in no time. So what are you waiting for? Get started today!
You can checkout our documentation page page to see how some of the features from the RentalSetup platform can help you with your rental business.
Checkout our facebook page
RentalSetup
The easiest way to build your rental business website. Get started for free.
Legal
Privacy Policy© 2026 RentalSetup. All rights reserved.