How to Create a Product For your rental business website
Video Tutorial
Overview
There are two types of products you can create on RentalSetup:
- Regular product — a single rental item with its own dedicated product page. Good for individual items like a bounce house, a waterslide, or a tent.
- Multi-product page — a page that groups multiple rental items together. Good for collections like all your chairs and tables, or all your inflatable games on one page. Learn more about the multi-product page →
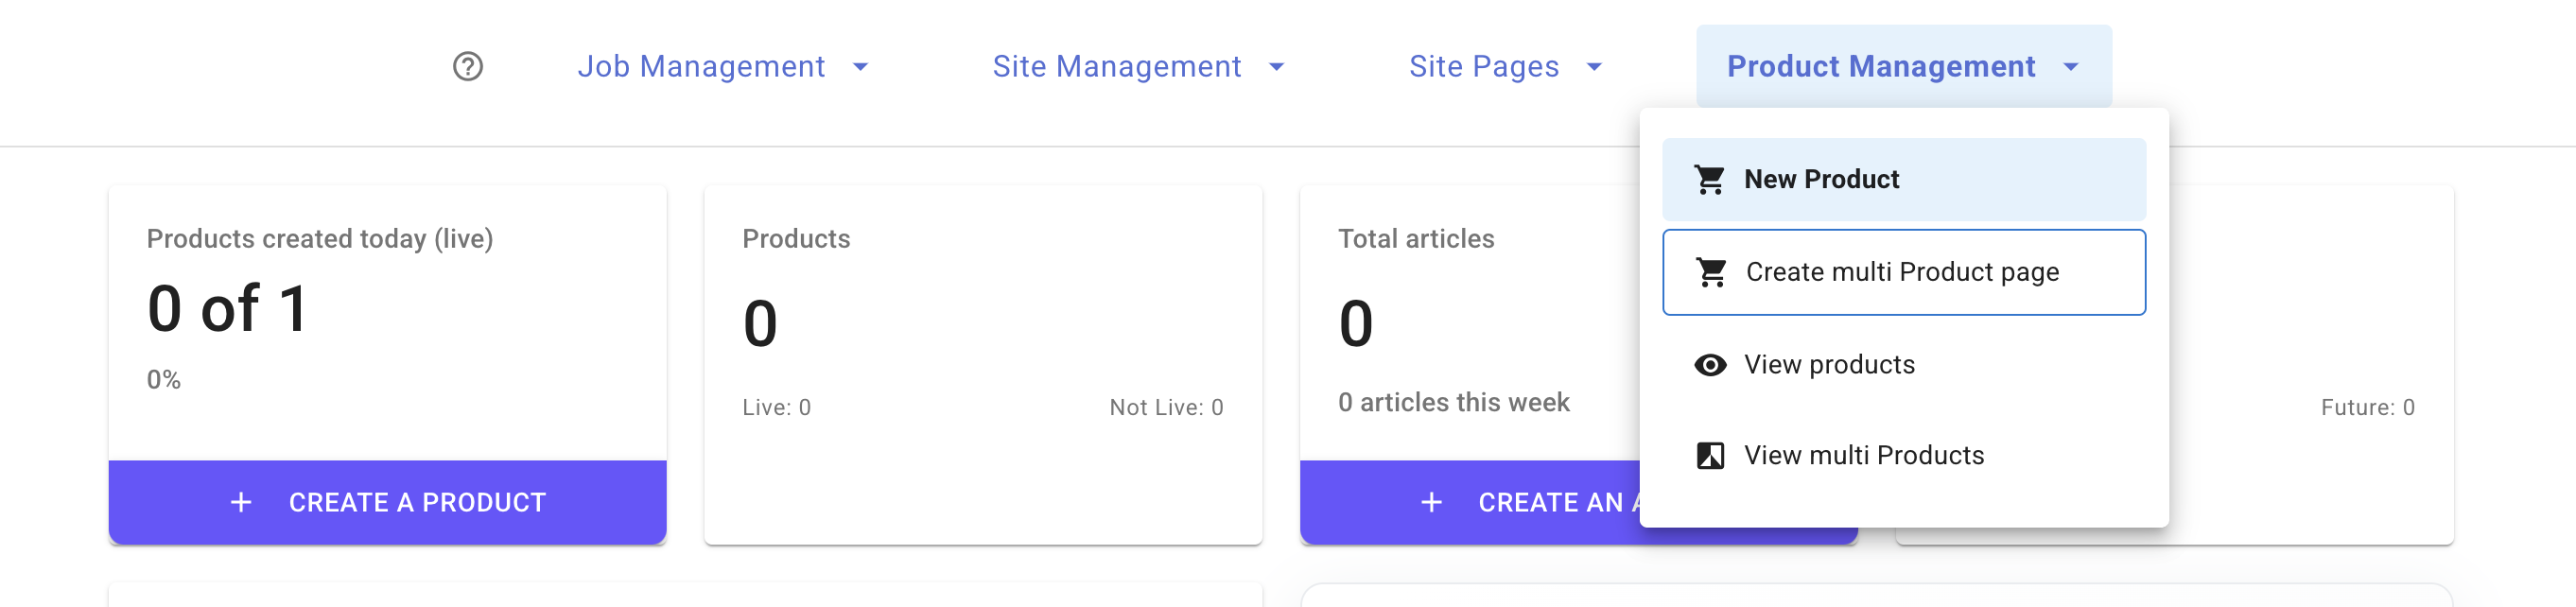
To get started, click the Create dropdown in the navigation bar. You will see two options — Create Product for a regular product, or Create Multi-Product to set up a grouped page.
Product Creation Stepper
The product creation process uses a step-by-step form (stepper). Each step covers a specific part of the product setup — name and description, pricing, images, categories, and scheduling options. You move through the steps in order and save at the end.
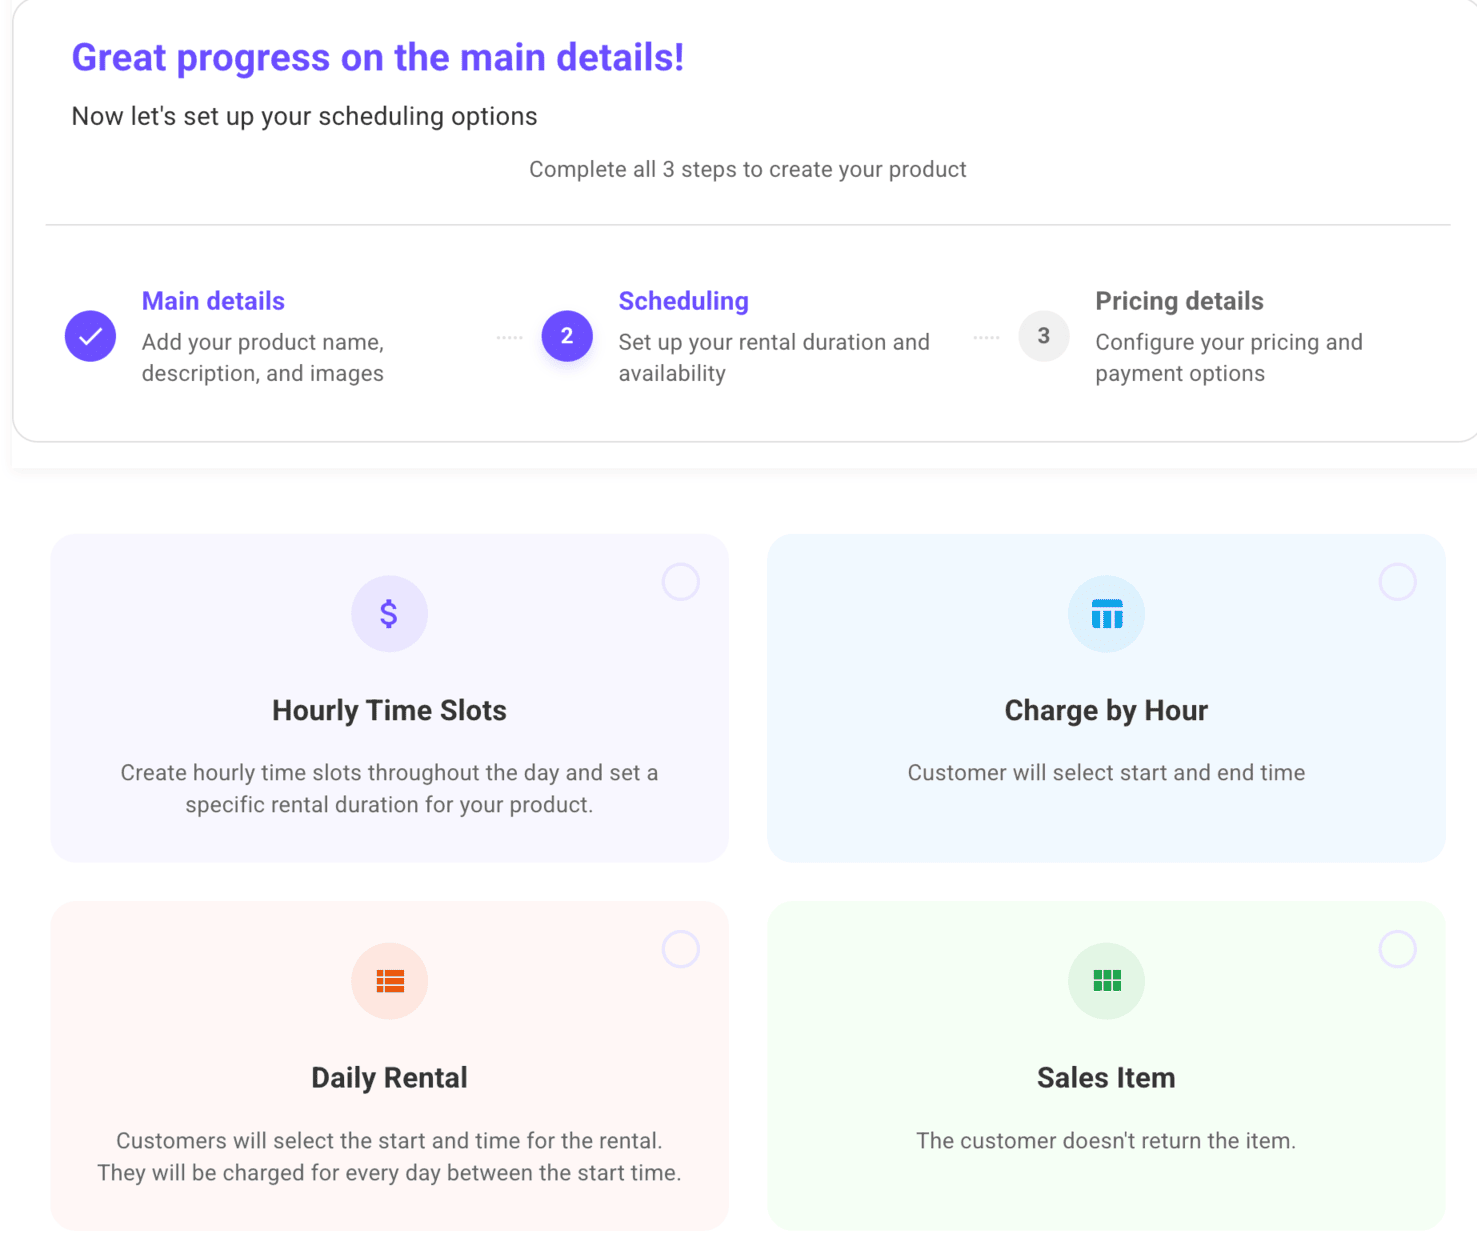
On the first step you will be asked to choose the type of product. This determines the scheduling view customers will see on the product page.
Choose a Scheduling Type
During product creation you will be asked to choose how customers schedule or purchase the rental. There are four options:
- Hourly Time Slots — You create specific time slots throughout the day and set a fixed rental duration. Customers pick from the available slots. Good for bounce houses or waterslides rented for a set number of hours at specific times.
- Charge by Hour — The customer selects a start and end time and is charged based on the number of hours between them. Good for equipment where rental length varies by customer.
- Daily Rental — The customer selects a start date and end date and is charged for every day in between. Good for tents, tables, chairs, or any equipment rented overnight or for multiple days.
- Sales Item — The customer purchases the item outright and does not return it. No scheduling is involved. Good for supplies or add-ons sold alongside rentals.
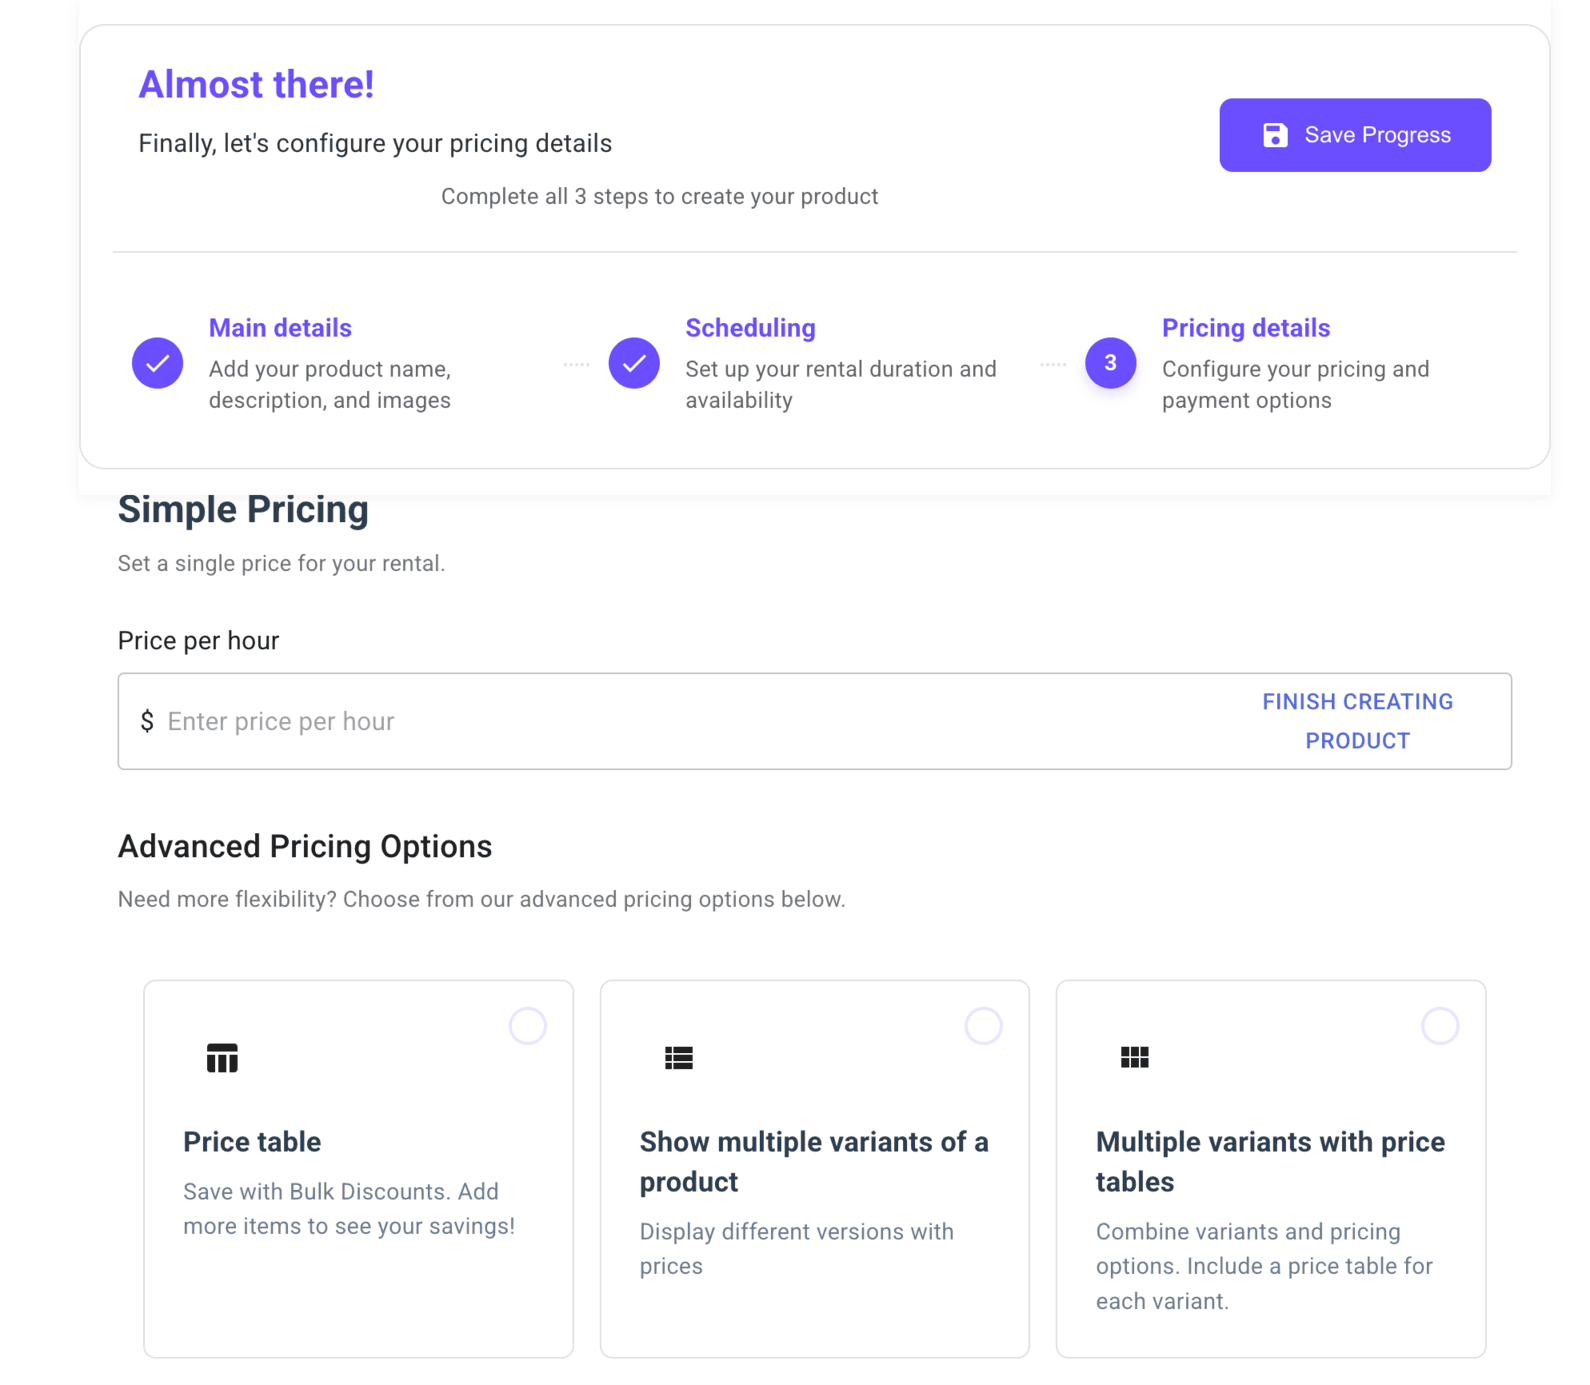
Pricing Structure
After choosing the scheduling type, the next step is setting up pricing. There are four pricing structures to choose from depending on how your rental is sold:
- Simple pricing — one flat price for the product. The customer sees a single price and books at that rate. Good for most standard rentals.
- Show a price table — displays a quantity input to the customer. You can set tiered pricing so larger quantities get a discount. Good for chairs, tables, or any item rented by quantity.
- Multiple variants — different versions of the same product each with their own price. For example a small bounce house at $149 and a large bounce house at $199 on the same product page.
- Multiple variants with price tables — combines variants and quantity pricing. Each variant has its own price table. Good for products that come in different sizes and are also rented by quantity.
Multi-Product Page
If you want to group multiple rentals on a single page — for example all your chairs and tables, or all your inflatable games — use the multi-product page. This lets customers browse and book from a collection of items in one place.
Learn how to set up a multi-product page →
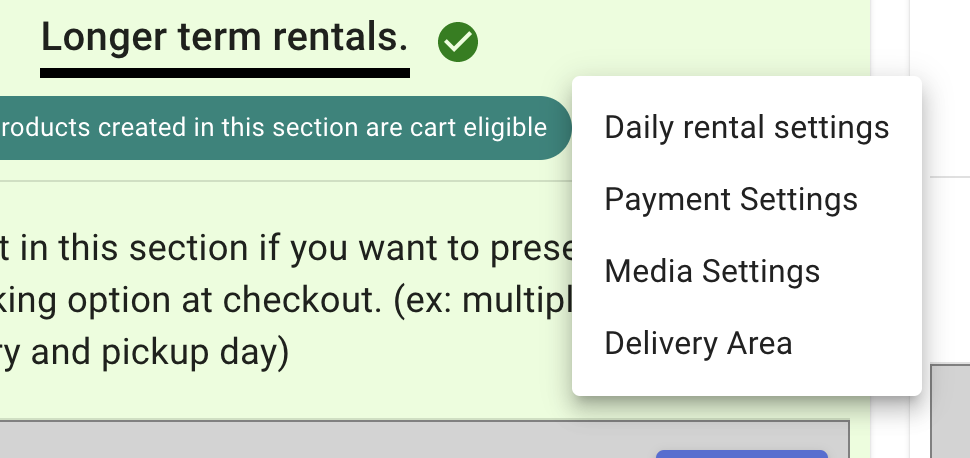
3-Dots Menu — General Settings
At the top of each column on the create page there is a 3-dots menu. Click it to attach general settings that apply to all products in that column. Options include:
- Show YouTube videos or images at the top and bottom of the product page
- Show a credit card form and set how much of the payment to collect upfront
- Show delivery or pickup options
RentalSetup
The easiest way to build your rental business website. Get started for free.
Legal
Privacy Policy© 2026 RentalSetup. All rights reserved.